


A louvre vent is one of those small jobs that looks fiddly until you have done one, and then it takes ten minutes. The angled slats, usually set between 30 and 45 degrees, let air pass freely in both directions while shedding rain and keeping debris out of the cavity behind it. Whether you typed how to fit louvre vent, how to fit louvre air vent, or simply want to swap a tired cover for a new one, the process below is straightforward once you know the steps.
This guide covers replacing an existing vent, fitting a louvre vent into a brand new opening in solid and cavity walls, the tools you need, common mistakes, and whether louvre vents leak.
Tools and Materials You Will Need
For a simple swap you need little beyond a screwdriver. For a new opening:
- A screwdriver or drill driver for the fixing screws
- A masonry drill bit and SDS drill for new openings, or an old chisel and club hammer for softer lime mortar
- A bricklaying trowel and pointing trowel for spreading mortar and finishing edges
- A spirit level to keep the vent square while the mortar goes off
- Masonry cement, building sand and water, roughly 1 part cement to 5 parts sand
- A telescopic plastic sleeve for cavity wall fitting
- Safety glasses and gloves, since chiselling and drilling brick throws off sharp dust
The louvre vent collection at Essentials Fix stocks a range of sizes and finishes to match whatever is already in your wall.

Replacing an Existing Louvre Vent
This is the most common job, and it is quick. Most houses already have an airbrick, terracotta sleeve or moulded plastic frame built into the wall, with the old louvre vent cover screwed or clipped onto the front. No cutting or drilling of brickwork is involved.
Remove the old cover first. Most are held with two or four screws through the corner lugs, though some clip fit models pop off with a firm pull. Clear out any old sealant or debris inside the hole, and check none of the internal slots are blocked, since a partially covered vent restricts airflow even if it looks fine from outside.
Offer the new louvre vent up to the same fixing holes. If you are searching for how to attach louvre air vent covers, or typing it as how to attache louvre air vent, the answer is the same short process: line up the lugs, drive the screws back through the original holes, and check the fit is snug with no gaps. For how to attache louvre air vent to airbrick openings where the screws have rusted, a smear of filler in the old hole and a slightly larger screw usually solves it.
Many older properties use terracotta sleeves with a plaster reveal on the inside face, particularly around suspended timber floors. For how to fit a louvre vent to terracotta frame openings, the method is nearly identical to an airbrick swap: remove the old fixings, clean the frame's edge, and screw the new vent through the same lugs. For how to fit a louvre vent to terracotta frame interior openings, meaning the plastered inside face, take extra care not to crack the plaster edge, since old plaster can be brittle. A thin bead of sealant around the rim neatens the join.
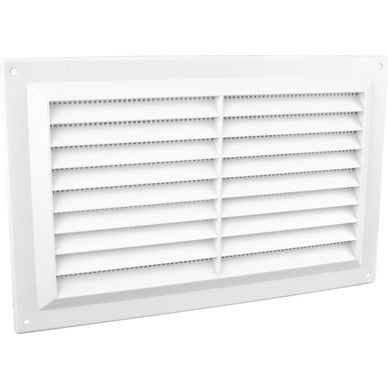
The job typically takes five to ten minutes, and suits standard sizes such as the 9 x 3 inch plastic louvre vent for a single brick course, or the 9 x 6 inch louvre vent for a double course opening.
Fitting a New Louvre Vent Opening in a Solid Wall
Sometimes there is no existing opening, for example when adding ventilation to a previously sealed room, or improving airflow under a suspended floor. This job takes longer, but remains within reach of a confident DIYer.
Mark out the opening on both faces of the wall, checking the size against the vent you plan to fit. Standard UK sizes are 9 x 3in, 9 x 6in and 9 x 9in, matching one, two or three brick courses. Use a masonry drill bit and SDS drill to break up the mortar joints around the marked area, or an old chisel and club hammer if the mortar is old and soft.

Clear out all loose mortar, brick dust and debris. A dusty, crumbling opening will not hold a vent securely, so take the time to get it clean first.
Mix mortar to roughly 1 part masonry cement to 5 parts building sand, adding water gradually until it holds its shape on the trowel. Butter the inside edges of the opening and the back of the vent, then bed the vent into place. Tap it gently with the trowel handle until flush with the surrounding brickwork, checking with a spirit level as you go.

Leave the mortar to firm up before pointing the edges to blend the new work into the existing brick face, then poke a thin tool through each vent hole to confirm nothing is blocking the slats.
Fitting a New Louvre Vent Opening in a Cavity Wall
Cavity walls need one extra step. Because there is a gap between the inner and outer leaf of brickwork, simply bedding a vent into the outer face would leave that cavity open to debris and damp. The fix is a telescopic plastic sleeve, sized to bridge the gap between the two leaves. Fit the sleeve before bedding the outer louvre vent onto it, so air travels straight through without any exposed cavity.
If the opening sits above the damp proof course, usually the case above ground floor level, you also need a cavity tray fitted directly above the vent. This strip of dpc material catches moisture running down inside the cavity and directs it back out through weep holes. Skipping this step is a common cause of damp patches appearing around a newly fitted vent.
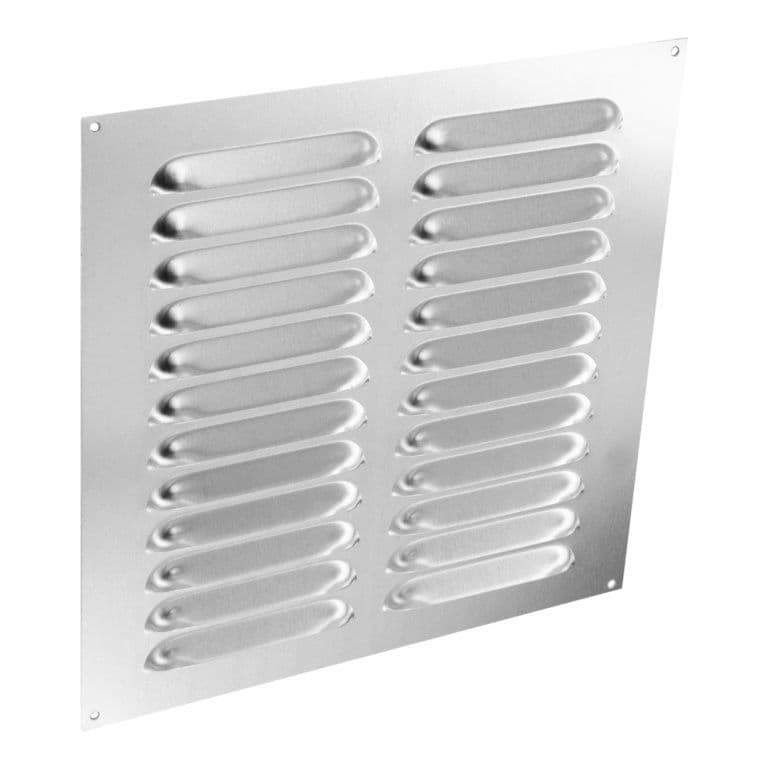
Beyond the sleeve and tray, the process matches a solid wall installation. The 9 x 9 inch aluminium louvre vent suits larger cavity wall openings where extra rigidity helps, while the 9 x 6 inch brown plastic louvre vent blends in well against darker brick or render.
Spacing and Ventilation Guidance
UK Approved Document C sets out background ventilation requirements, generally 1500 square millimetres of free area per metre run of wall, or 500 square millimetres per square metre of floor area, whichever is greater. In practice this means spacing vents roughly every 1.8 to 2 metres along external walls, with vents on at least two opposite sides of a building for cross ventilation. Always keep the slats angled downward and outward, since that sheds rain away from the opening.
Common Mistakes to Avoid
- Leaving mortar in the vent holes. It is easy to smear mortar over the slats while pointing. Poke through every opening once set to confirm airflow is not restricted.
- Fitting the slats upside down. Fitted the wrong way round, slats channel rain into the wall instead of shedding it, which is why people ask do louvre vents leak, when the vent itself is usually fine.
- Skipping the cavity tray on a cavity wall. Missing this step above the damp proof course is a common cause of damp tracking in around a newly fitted vent.
- Not clearing debris before bedding the vent. A dusty, crumbling opening will not hold a solid mortar joint, and the vent can work loose over time.
- Under spacing vents. Fitting one small vent where a room needs two undermines the ventilation guidance.
Frequently Asked Questions
Do louvre vents leak?
A correctly fitted louvre vent, with slats angled downward and outward, should not let rain in. Most leaks trace back to slats fitted upside down, a poor mortar joint, or a missing cavity tray, rather than a fault with the vent itself.
What size louvre vent do I need?
Standard UK sizes are 9 x 3in, 9 x 6in and 9 x 9in, matching one, two or three brick courses. Measure your existing opening, or the airbrick you are replacing, before ordering, since an oversized vent will not sit flush.
Can I fit a louvre vent myself without a tradesperson?
Replacing an existing louvre vent cover is a genuine five to ten minute DIY job needing only a screwdriver. Cutting a brand new opening takes longer and a steadier hand, but remains a manageable weekend job for most confident DIYers, particularly on a solid wall.
How do plaster vent covers differ from louvre vents on brick?
A plaster vent cover typically finishes flush against an internal plastered wall or terracotta sleeve rather than external brickwork. The fitting principle is the same, but work carefully around the plaster edge to avoid cracking it, particularly on older terracotta frame openings.
Matching the right size and finish makes the job simpler. Browse the full range of louvre vent covers, including the 165mm circular louvred vent for round duct openings, to find the right fit before you start.
